 Save
Save The idea for these graduation cheesecake bites came to me one spring, as the kitchen filled with the brightness of late afternoon and the distant laughter of prepping for a celebration. I could practically taste the anticipation in the air, which had me craving something both nostalgic and festive. Cheesecake has always felt special to me—the kind of treat that puts a sparkle in even an ordinary day. For such a big milestone, it needed to be celebratory, but without the stress of full-size cakes or fancy pastries. The scent of the buttery crust baking made my nerves fizz with excitement and a little mischief, knowing I was about to sneak an extra warm bite before the crowd arrived.
Last June, I made a triple batch for my cousin's backyard graduation and was secretly thrilled when the adults hovered at the dessert table just as much as the teens. We joked about 'taste-testing' while assembling the topping, arguing over which sprinkles looked the most like school colors. By the end of the party, I spotted people swiping cheesecake crumbs straight from the pan, their formal ‘Congratulations’ forgotten in the sweet chaos. It was the most laughter I’d seen from my family in weeks. The evening felt like a time-lapse of childhood milestones—these cheesecakes just happened to steal the spotlight.
Ingredients
- Graham cracker crumbs: They give the crust that iconic crunch and soak up just enough butter to crisp without crumbling—press them in tightly for sturdy bites.
- Granulated sugar: A little in the crust adds caramelized edges; in the filling, it balances tanginess.
- Unsalted butter: Melt it fully for even mixing with the crumbs; it’s the secret to a toasty base.
- Cream cheese: Room temperature cream cheese means silky-smooth filling and no lumps—leave it out for at least 30 minutes before starting.
- Eggs: Add one at a time, and only mix until just combined so the cheesecakes stay creamy instead of airy.
- Pure vanilla extract: It rounds out the flavor, making each bite fragrant and luxurious—don’t skimp.
- Sour cream: A touch gives a gentle tang and keeps the texture tender; trust me, it’s worth it.
- Pinch of salt: Just a tiny bit sharpens the sweetness and makes every flavor pop.
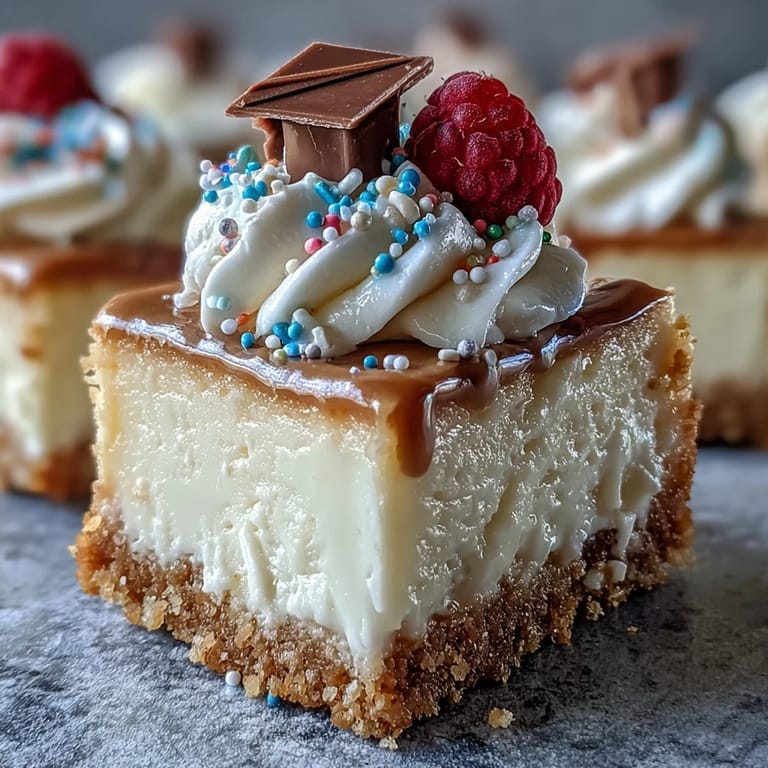
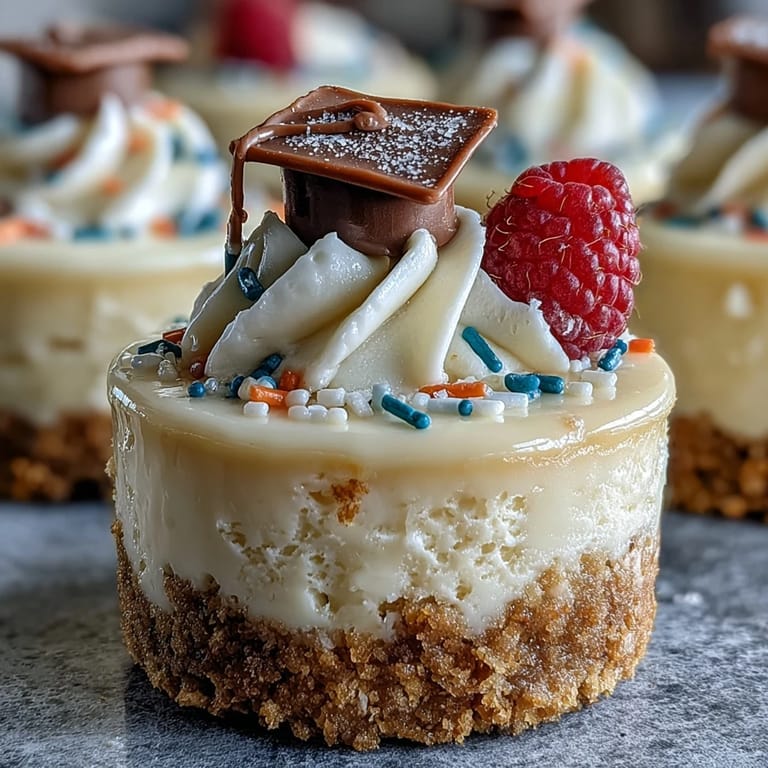
- Whipped cream & festive toppings: Not required, but who could resist the party flair of cream, sprinkles, or the cuteness of candy graduation caps?
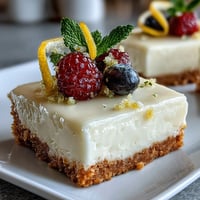
- Fresh berries: For a lighter, colorful garnish that looks as celebratory as confetti.
Tired of Takeout? 🥡
Get 10 meals you can make faster than delivery arrives. Seriously.
One email. No spam. Unsubscribe anytime.
Instructions
- Get set up:
- Preheat your oven to 325°F (160°C), and line the mini muffin tin so you’re not greasing fiddly cups later.
- Mix and press the crust:
- In a bowl, combine graham crumbs, sugar, and the golden puddle of melted butter, stirring until every crumb glistens. Spoon in a tablespoon's worth and press down firmly—it should feel satisfyingly packed under your spoon.
- Bake the base:
- Slide the pan in for 5 minutes, just enough for the crust to toast up and take shape. Let cool briefly so the next layer doesn't melt right in.
- Create the cheesecake filling:
- Beat the cream cheese until it’s as smooth as possible, then add sugar, mixing until pillowy. Add the eggs one by one, scrape down the bowl, and gently mix in vanilla, sour cream, and salt—only until just blended, so the filling stays thick and creamy.
- Fill and bake:
- Spoon the batter into each cup, almost to the top—don’t worry if it looks too full, as they barely puff. Bake 13 to 15 minutes, until you see a gentle jiggle and set edges.
- Cool and chill:
- Let the bites rest for 10 minutes in the tin, then move them to a rack and cool to room temp. Pop them in the fridge for at least 30 minutes to set for that perfect creamy bite.
- Decorate:
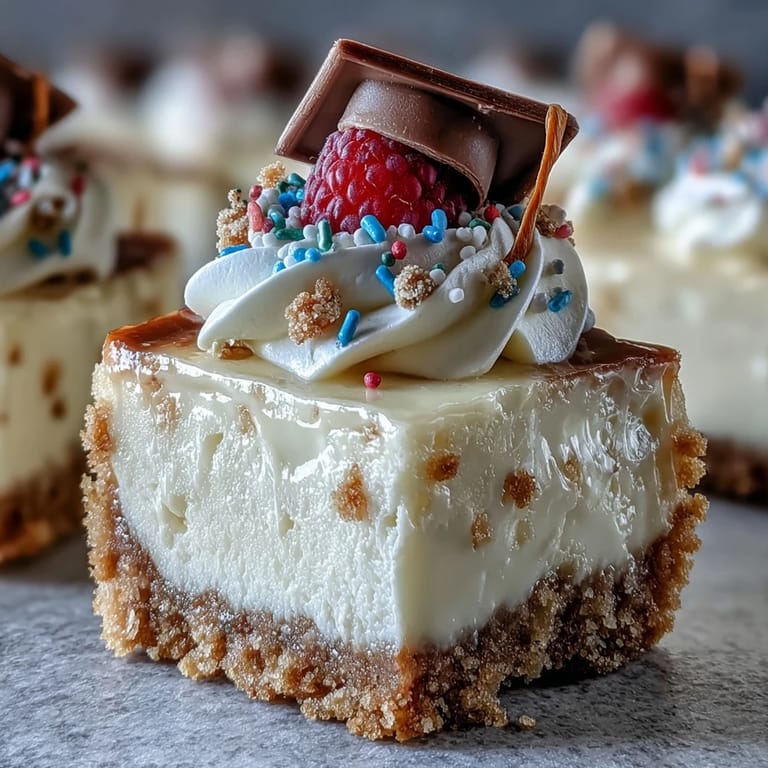
- Just before serving, swirl on whipped cream, sprinkle on the confetti, and crown with berries or those adorable candy caps—it’s graduation, after all.
 Save
Save One quiet afternoon, after the guests had left and the decorations had come down, I noticed two cheesecake bites still waiting in the fridge. I sat at the counter with my little brother, and we split the last one while the room buzzed with the comfort of a celebration well earned. The mess and clatter faded into gratitude with each creamy, tangy mouthful. Somehow, the bitesize treat tasted brighter, reminding me of simple joys long after the crowd was gone.
Perfect for Any Occasion
Mini cheesecakes aren’t just for graduations—I've brought them to baby showers, potlucks, and late-night movie marathons. Their small size means everyone can indulge without committing to a heavy dessert, and nobody feels awkward going in for seconds—or thirds. They're ideal for customizing: keep a stash of sprinkles, fruit, and piping bags on hand, and everyone gets their favorite finish. Even kids get excited to help with the toppings, though it’s basically guaranteed some ‘tasting’ will happen during decorating. I now keep extra crust ingredients around just for last-minute party treats.
Decorating for Extra Festivity
It’s amazing how a swirl of whipped cream or a single juicy berry can transform plain cheesecake into a centerpiece. For graduation, I use mini chocolate squares for caps and cut licorice to string on as tassels. Swapping to colored nonpareils or chocolate cookie crumbs turns them into a whole new treat for any celebration. I learned the hard way that piping whipped cream right before serving prevents droopy decorations. If you’re feeling fancy, try a drizzle of homemade fruit compote for a tangy twist.
Troubleshooting and Last Minute Tips
Sometimes a few cheesecake bites end up with air bubbles on top, but a quick tap on the counter before baking helps settle the batter. If the crust seems too loose after pressing, use the back of a small measuring cup to get sharp edges and a compact base. When storing overnight, cover with plastic wrap to keep them from absorbing fridge flavors.
- Don’t unwrap until they’re cold for clean edges.
- Swap for gluten-free cookies if needed—no one will notice.
- Set out toppings in bowls so guests can decorate their own.
 Save
Save Whether you’re tossing graduation caps or just craving a little kitchen celebration, these cheesecake bites are always the first to disappear. They’re my secret weapon for making any gathering simply unforgettable.
Recipe FAQ
- → How do I know when the centers are done?
Check for a slight jiggle in the center—edges should be set while the middle still has a gentle wobble. Residual heat will finish firming them as they cool.
- → Can I swap the graham crust for something else?
Yes. Use crushed chocolate cookies or digestive biscuits for a richer base; mix with melted butter and press firmly into the mini cups before pre-baking.
- → How long should they chill before serving?
Chill at least 30 minutes to set the texture, though a few hours improves sliceability and flavor. Cover tightly to prevent fridge odors.
- → What prevents cracks in the filling?
Avoid overmixing after adding eggs and bake just until centers are set. Gentle mixing and modest oven temperatures help keep the texture smooth without cracking.
- → Can I prepare these ahead of time?
Yes—bake and chill up to one day ahead, storing in an airtight container. Add whipped toppings and fragile decorations just before serving for best appearance.
- → Any tips for festive graduation decorations?
Create mini mortarboards with small chocolate squares and licorice string, or use colorful sprinkles and fresh berries for a bright, bite-sized presentation.