 Save
Save My sister called me three weeks before her daughter's First Communion, her voice carrying that particular mix of excitement and panic that comes with planning a milestone celebration. She asked if I could make the cake, and I immediately pictured something elegant but not fussy—a sheet cake that would feed the whole gathering without requiring me to construct a gravity-defying tower. That's when I discovered the magic of fondant: how it transforms a simple sheet cake into something that looks like it belongs in a celebration, all while being surprisingly forgiving to work with once you understand its temperament.
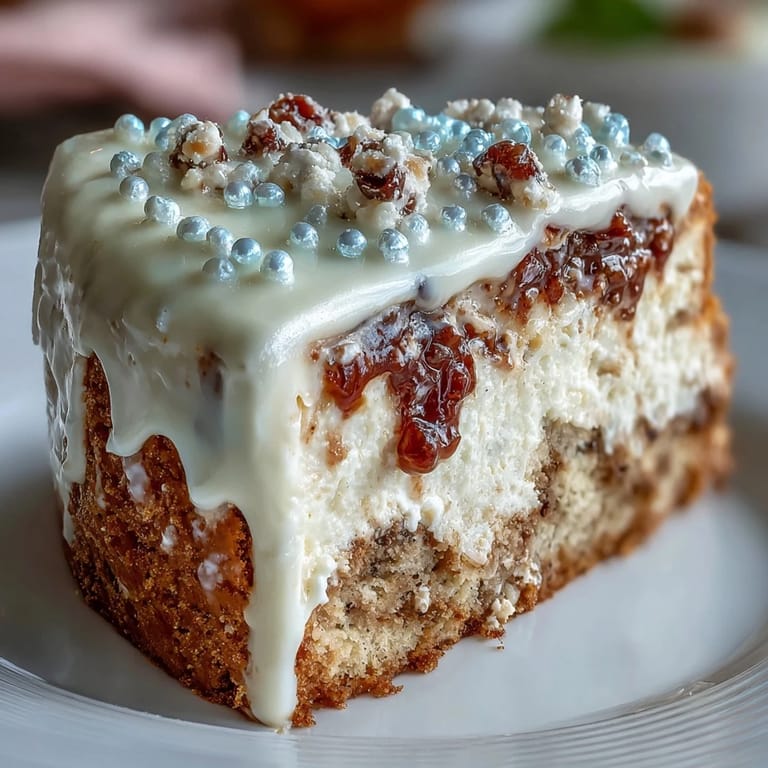
I'll never forget unrolling that fondant over the buttercream while my sister's daughter watched from the kitchen doorway in her white dress, not yet ready for the actual party but unable to stay away. The way the fondant stretched smooth without tearing, the pearl dust catching the afternoon light—she whispered that it looked like something from a fairy tale, and suddenly the whole project felt less like baking and more like creating a memory.
Ingredients
- All-purpose flour: The foundation of a tender crumb; make sure it's fresh and spoon it into your measuring cup rather than scooping directly from the bag, which compacts it and throws off your ratios.
- Baking powder: This does the heavy lifting for rise, so verify that your container isn't sitting in the back of the cupboard from last year—stale baking powder won't give you the lift you need.
- Granulated sugar and softened butter: The creaming of these two is where the magic begins; take thirty seconds longer than you think necessary to get them light and fluffy, almost pale yellow.
- Room temperature eggs: Cold eggs won't incorporate smoothly into the batter, and you'll end up with a denser, less forgiving cake, so pull them out about thirty minutes before you start.
- Whole milk: The alternating additions with flour keep the batter from becoming tough; think of it as a rhythm that keeps everything tender.
- Powdered sugar for the buttercream: Sift it first, even though it feels like an extra step, because unsifted powdered sugar has tiny lumps that never fully dissolve no matter how long you beat it.
- Pearl fondant: Ready-to-roll fondant saves you from having to make marshmallow fondant from scratch, and for a project like this, that practical choice lets you focus on the decoration rather than stress about consistency.
- Pearl luster dust: This is the element that elevates the whole cake from nice to luminous; a light hand with the brush creates something far more elegant than a heavy application.
Tired of Takeout? 🥡
Get 10 meals you can make faster than delivery arrives. Seriously.
One email. No spam. Unsubscribe anytime.
Instructions
- Prepare your pan and preheat:
- Set your oven to 350°F and give it a few minutes to reach temperature while you grease that 12x18-inch pan thoroughly and line it with parchment paper. The parchment isn't just convenient—it's your guarantee that the cake releases cleanly without any broken edges.
- Combine your dry ingredients:
- Whisk flour, baking powder, and salt together in a medium bowl, making sure the baking powder is evenly distributed so you get consistent rise throughout the cake. This takes less than a minute and prevents any pockets of unmixed powder that would create strange textured spots.
- Cream butter and sugar:
- Beat them together until the mixture looks pale and fluffy, about three minutes with a stand mixer or longer with hand mixer—you're essentially incorporating air into the butter, which creates lift when those eggs go in. Don't rush this step; it makes a genuine difference in the final texture.
- Add eggs and vanilla:
- Introduce each egg one at a time, letting the mixer incorporate it fully before adding the next one; this gradual approach keeps the batter emulsified and smooth. The vanilla extract goes in with the last egg.
- Alternate flour and milk:
- Start with flour, then milk, then flour again, ending on flour—this pattern keeps the batter from becoming tough or separated. Mix on low speed just until combined; you're not making whipped cream, and overmixing develops gluten in a way that toughens the final cake.
- Bake until golden:
- Pour the batter into your prepared pan, smooth the top with a spatula, and bake for 30-35 minutes until a toothpick inserted in the center comes out clean. The kitchen will smell incredible—that vanilla and butter aroma is one of the few things that makes ovens worth having.
- Cool properly:
- Let the cake sit in the pan for ten minutes, then turn it out onto a wire rack to cool completely; this prevents the bottom from getting soggy while still being warm and fragile. Complete cooling is essential before you add buttercream, or it'll melt into the warm cake.
- Make your buttercream:
- Beat softened butter until creamy, then gradually add sifted powdered sugar along with milk, vanilla, and a pinch of salt, beating until light and fluffy. This thin, smooth layer will hold the fondant in place and give it something to grip.
- Spread buttercream evenly:
- Once the cake is completely cool, apply a thin, even layer of buttercream across the entire surface and sides using an offset spatula. This is your adhesive, so you don't need thick coverage—just enough to create a smooth, slightly sticky surface.
- Roll and drape fondant:
- On a surface dusted lightly with powdered sugar, roll out your fondant to about 1/8-inch thickness, then carefully drape it over the cake. Use your hands or a fondant smoother to gently press out air bubbles and create smooth coverage, working from the center outward.
- Trim and refine:
- Use a sharp knife to cut away excess fondant from the edges and bottom, cleaning up the lines so everything looks intentional. The trimmings can be saved and kneaded back together for another use.
- Add pearl dust and decorations:
- With a dry food-safe brush, dust pearl luster dust lightly across the fondant surface to create that luminous, elegant finish. For edible pearls or special decorative elements, brush tiny spots with water where you want them to adhere, then press them gently into place.
- Final shine (optional):
- If you want added shimmer, mix a tiny bit of corn syrup with water and brush it very lightly over the fondant—this step should be subtle, almost imperceptible. Let the cake set for at least thirty minutes before serving, giving the fondant time to firm up.
 Save
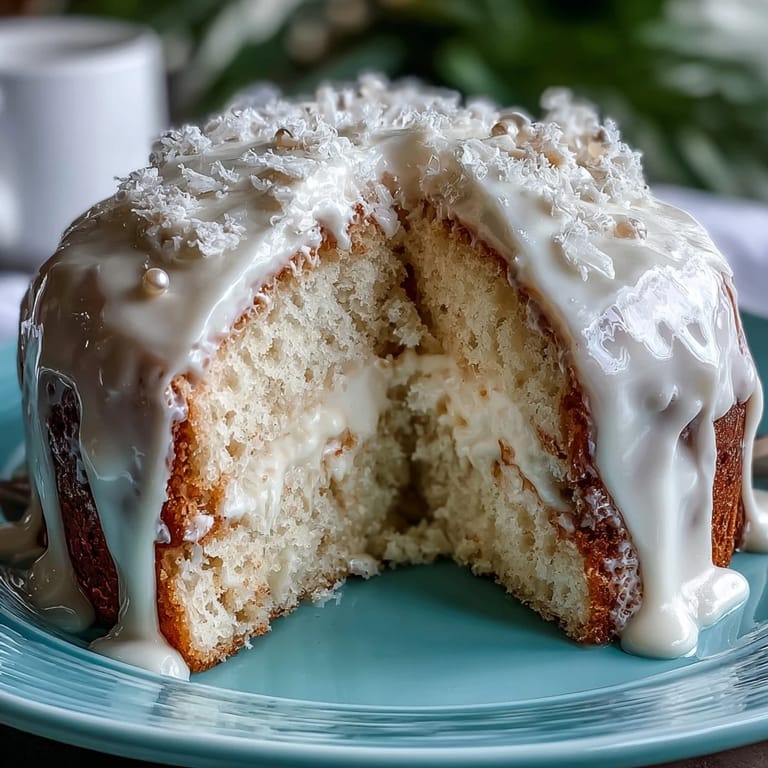
Save Standing back to look at that finished cake in my sister's kitchen, watching how the light played across the pearl dust, I realized that this isn't really about having the skills of a professional baker. It's about taking a straightforward, honest sheet cake and giving it the presentation it deserves for a celebration that mattered.
Building Elegance Without Stress
The beauty of this cake is that it doesn't pretend to be something it's not—it's not a towering creation that requires architectural engineering or months of practice. What it does is take the comfort of a classic sheet cake and dress it up with fondant in a way that feels achievable, even if you've never worked with fondant before. My first attempt with fondant was honestly terrifying, all trembling hands and quiet panic, but I discovered that fondant is actually quite resilient and almost wants to cooperate if you give it the right conditions: cool hands, a light touch, and confidence that comes from knowing you can smooth out small mistakes.
The Flavor Story
This cake tastes exactly the way you'd hope a celebration cake would taste—it's not overly sweet despite the generous sugar, the vanilla is present but not overwhelming, and the buttercream strikes that balance between rich and light. Some people add almond extract to half the vanilla, which creates a more delicate flavor that pairs beautifully with fresh berries or a light fruit coulis served on the side. If you're serving this at an afternoon gathering where wine might flow (for the adults), a glass of Moscato or Riesling complements the cake's sweetness in a way that feels sophisticated without being fussy.
Timing and Preparation Tips
If you're feeling organized (or if you just want to take some pressure off the day of the celebration), you can bake this cake up to a day ahead, letting it cool completely and then wrapping it tightly before decorating. The buttercream also benefits from being made a few hours in advance, giving it time to set slightly before you spread it. With the timing broken down like this—cake baked, cooled, and wrapped on day one; decorating on day two while the cake is still fresh—the whole project feels manageable rather than overwhelming.
- Make sure your fondant is at room temperature before rolling, or it will crack and resist your efforts.
- Keep any fondant you're not actively using wrapped tightly, or it will dry out and become unworkable.
- If your kitchen is particularly warm, refrigerate the finished cake for ten minutes before serving so the fondant doesn't soften too much under the presentation lights.
 Save
Save This cake became the centerpiece of a real celebration, surrounded by family and the kind of joy that comes from gathering for meaningful moments. That's what makes the effort worthwhile—not the technique or the decorating, but knowing that the cake itself becomes part of the memory of the day.
Recipe FAQ
- → How is the fondant applied smoothly?
After rolling fondant to about 1/8-inch thickness, gently drape it over the cooled cake and smooth using hands or a fondant smoother to avoid wrinkles.
- → What helps the fondant stick to the cake?
A thin layer of creamy buttercream is spread over the cake to provide an adhesive surface for the fondant, ensuring it stays in place.
- → Can alternative flavors be used?
Yes, substituting half the vanilla with almond extract adds a subtle nutty note without overpowering the cake's profile.
- → How to achieve a shiny finish on the fondant?
Lightly brushing a mixture of corn syrup and water over the fondant creates a delicate sheen enhancing the pearl decorations.
- → What temperature and time are best for baking?
Bake at 350°F (175°C) for 30-35 minutes until a toothpick inserted in the center comes out clean for a perfectly baked crumb.
- → How should the cake be stored before decorating?
It can be baked a day ahead and wrapped tightly to maintain freshness until ready for fondant application.